Showing posts with label ♥ Cupcakes ♥. Show all posts

Monday, July 18, 2011

♥ Lemon Cupcakes with Blueberry Buttercream ♥


    Every time I've ever baked in my kitchen (or any kitchen, for that matter), I've always learned something, each and every time. During this bright, summery-themed adventure (part of my 7 Hour Baking Marathon a couple nights ago), I learned something new about myself:

    I don't like the combination of lemons and blueberries. At all.

    I was always entranced by the two together: the colors complimented each other so perfectly, so shouldn't the tastes have too? I always assumed so, but when I tasted the buttercream from this recipe, my taste buds gave their answer: a big, fat, slightly-repulsed no.

    That's just my opinion, of course. People can't seem to get enough of this combo, especially during summer when both fruits are at their best. Maybe it's just because I've never really liked blueberries (I think. I don't care for them on their own, but when they're baked into a pastry, I can't get enough of them. Plus their color is to die for.. Love-Hate Relationship much?), or maybe it's just because that night, after spending about an hour of working with lemons, lemons, and oh, more lemons, the taste started nauseating me, and then with the addition of lemon zest into the frosting...my taste buds were just not happy campers.

   After I forgot about the cupcakes for a few days in my fridge though, the frosting wasn't all that bad. Regardless though, my family went bonkers for it, so I guess it's all good.

    The cupcakes we're really amazing though. The recipe came from a blogger named My Baking Addiction, and it was absolutely wonderful: the cupcakes were perfectly soft, fluffy, sweet, and lemony. I didn't get a chance to try out the lemon curd recipe that went with it though, but if anyone wants to try it, the recipe can be found here.

    Now, after spending 2 hours baking these little gems and making the frosting to go with them, but then being disappointed with the frosting, there was no way I'd let my hard work go to waste and leave these cupcakes plain, so I made a quick icing to go on them: by whisking about 2 tablespoons of milk, a drop of lemon extract, and enough powdered sugar to thicken it, I had a simple but perfect topping for my little cakes.

    The original recipe for these cupcakes can be found here, or, you can just follow it down below for a few tips and pointers. Happy baking! :]

Lemon Cupcakes

Ingredients: 
♥ 2 1/4 cups cake flour
♥ 1 tablespoon baking powder
♥ 1/2 teaspoon kosher salt
♥ 1 1/4 cups buttermilk, well shaken, room temperature
♥ 4 large egg whites, room temperature (crack egg whites into a bowl, and let come to room temperature)
♥ 1 1/2 cups granulated sugar
♥ 2 lemons
♥ 1 stick (8 tablespoons) unsalted butter, at room temperature
♥1 teaspoon pure vanilla extract
♥ 1/2 teaspoon pure lemon extract

1. Preheat oven to 350°. Line cupcake tins with paper liners. In a large bowl, sift together the flour, baking powder and salt. (this can just be done by simply whisking everything together.)


2. In a medium bowl, whisk together the milk and egg whites.
3. Place lemons on a plate. Zest each lemon completely with a zester. If you don't own a zester (or can't find yours like me), you can simply use a grater.


4. Place the sugar and lemon zest in the bowl of your mixer or another large bowl and rub them together with your fingers until the sugar is moist and fragrant.


5. Add the butter and, working with the paddle or whisk attachment, or with a hand mixer, beat at medium speed for a full 3 minutes, until the butter and sugar are very light. Beat in extracts.


6. Add one third of the flour mixture, still beating on medium speed. Beat in half of the milk-egg mixture, then beat in half of the remaining dry ingredients until incorporated. Add the rest of the milk and eggs, beating until the batter is homogeneous, then add the last of the dry ingredients. Finally, give the batter a good 2-minute beating to ensure that it is thoroughly mixed and well aerated.


7. Using a large ice cream scoop (about 3 tablespoons), distribute the batter between 24 muffin wells, filling each well 2/3 full.


8. Bake for 18-22 minutes, or until the cupcakes are springy to the touch and a toothpick inserted into the centers come out clean. Cool on wire rack.


Ahhh! I still cannot get over how perfect they came out.

The link for the buttercream and curd recipes are listed in the link above. Sadly, as I made the frosting, my camera battery decided it was going to die and leave me camera-less, so I have no pictures for that. I do have pictures of the finished product though...


Enjoy!

Sunday, July 10, 2011

♥ Not-So-Red Velvet Cupcakes ♥

  
    So...Like I said before, I'm not exactly the best 16 year old photographer on the block.

    In fact...Far from it.

    In addition to my horrible photography skills comes the unfortunate fact that I have only two cameras: my Kodak digital camera, and the camera on my phone, both of which have less than great quality. The camera on my phone works better than my actual camera, so until I take photography in my senior year... this is probably the kind of pictures you'll be seeing on my blog. *Sigh*.

    Anyway, now to the cupcakes...
I never really understood red-velvet cupcakes. Or, red-velvet cake in general for that matter. It lacked any sort of actual flavor, besides that slight hint of vinegar you have to fight to taste. In that case, who really likes the taste of vinegar anyway? (Well...probably a lot of people, especially in the South.) I can truthfully say I'm not a fan of vinegar at all, but hey, that doesn't mean everyone's the same way.

    Now, I'm sure some are wondering: If you don't like red-velvet, why on Earth would you make it?

    Well, the only thing I don't have against red-velvet is, well, the color. When I see little red-velvet cupcakes, topped with rich, white cream cheese frosting that off-sets the bright, vibrant red of the cake, I'll pathetically admit: I become slightly entranced by it.

    That isn't the only reason I made it though. This summer, I'm on a Cupcake Quest, trying to find and perfect recipes for all the basic cake flavors: chocolate, vanilla, lemon, strawberry, spice, white, and well, red-velvet. I figure if I'm CupcakeGirl, I can't discriminate on flavors. Why not give each it's chance to shine?
    Even though at first I didn't really have a preference for them, as soon as I frosted my little red gems with that addictive, sweet icing, they started growing on me. So, I'll admit: I guess red-velvet is okay...but I still prefer my classic real chocolate cake.

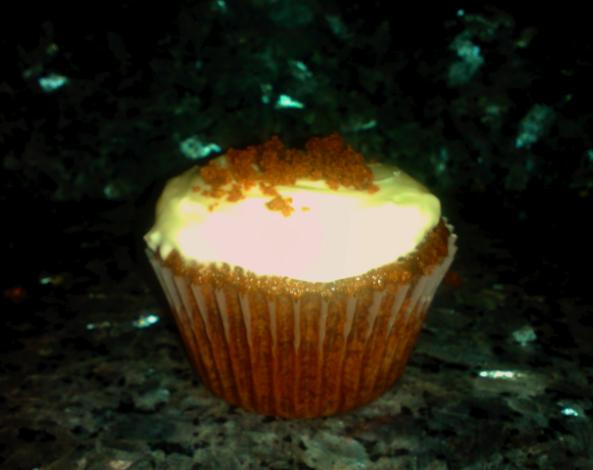
    As for my Red-Velvet adventure, not to my surprise one bit, there were quite a few problems along the way, and even in the end. You can only imagine the sadness in my perfectionist-heart when my little red gems came out of the oven...well, not very red. They were more of a reddish-brown; not at all the bright vibrant red I wanted. In addition to that heartbreaking bit, they also didn't rise as well as I wanted them to. As I thought about it though, I managed to pin-point where I went wrong as I went over each step in my head afterward. So, if you haven't already attempted your own red-velvet adventure, here's some tips to help get you started:

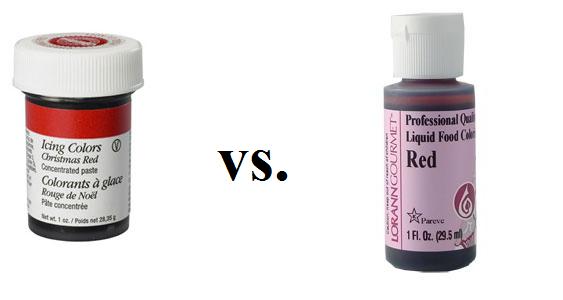
♥ This recipe called for liquid red food coloring, but I only had a gel on hand. Thinking if I just mixed it with water, I'd probably get the same results. I was right...partially. In using the gel, I didn't use the right amount of coloring whatsoever, so in making a paste with the color and the cocoa powder (the typical way of incorporating both ingredients in red velvet), the brown to red ratio was completely off, and I ended up with a brownish-red glob...yeah, not so much the dark vibrant red I needed. If you know how to make an exact substitute for liquid food color with the gel and water, go right ahead. But, if you're still a little inexperienced like me...just stick with the liquid, please.
 ♥ Next, one thing I really didn't do right was the last step: incorporating the baking soda/vinegar mixture completely into the batter. This mixture goes in last, and since it's the only leavening agent in the entire batter, it needs to be thoroughly mixed through the whole bowl. I stirred it in quickly, not paying enough attention to this step, which is probably why these cupcakes didn't rise as much as they should have. The recipe came from Allrecipes, in which I took the tips from users who'd made the recipe dozens of times. Comparing their pictures to mine...I can guess I did something wrong, to say the least.
    Am I extremely jealous of their fluffy red cupcake and beautifully piped frosting as well? ...Yes, yes I am.

♥ Finally, for the frosting, I used a cream cheese frosting, also from Allrecipes. The recipe claimed it could be piped, but even as I left it to chill in the fridge for a while, I could not get it to pipe whatsoever: it wasn't runny, just too thin to pipe. That had nothing to do with the taste though; my family raved it was one of the best frostings I'd ever made. It wasn't too sweet, but not too tangy either. If you're not a frosting snob like I, go ahead and use my recipe; if you want to pipe it though, you may want to use your own.

    Besides all my self-caused problems, this recipe actually came out pretty well. My boyfriend, a "Southerner At Heart" (He's a horror-movie fanatic, but was converted to "Cowboy" status by the movie Country Strong; go figure), as well as a red-velvet fanatic, claimed they were really good. The boy is picky about his cake, so I'll take that as a perfect sign to say this recipe is a keeper...for now.
    Like I said before, when I bake cupcakes, they have to be perfect, but this recipe came out only pretty good (to my standards: remember, I'm a perfectionist!). I'll be trying out another red-velvet recipe soon enough, but for now...Happy Cupcake making! ♥

Red Velvet Cupcakes with Cream Cheese Frosting

Ingredients: 
(for cupcakes)
♥ 3 tablespoons unsweetened cocoa powder
♥ 2 ounces liquid red food coloring
♥ 1 cup buttermilk, well shaken, room temperature
♥ 1 teaspoon salt
♥ 1 teaspoon vanilla extract
♥ 1 cup vegetable oil
♥ 2 cups granulated sugar
♥ 2 eggs, room temperature
♥ 2½ cups all-purpose flour, sifted
♥ 1½ teaspoons baking soda
♥ 1 teaspoon white vinegar

(for frosting)
2-8 ounce packages cream cheese, softened
½ cup (1 stick) butter, softened
4 cups powdered sugar, sifted
2-3 teaspoons vanilla

1.) Preheat oven to 350° F. Place cupcake papers in 2-12 count cupcake pans. (I got around 24 cupcakes from this recipe.)


2.) Make a paste of cocoa and food coloring. Set aside.(This is where I messed up, so be careful. The paste should be a dark, vibrant red, not a brown-red color.)


3.) Combine the buttermilk and vanilla and set aside. In a separate bowl, sift together the salt and flour. (To sift together dry ingredients, you can always just whisk them together until they are combined.)

 4.) In a large bowl, beat together the oil and sugar. Beat in the eggs one at a time, then stir in the cocoa mixture. Beat in the buttermilk mixture alternately with the flour, mixing just until incorporated. 


5.) Stir together baking soda and vinegar. (Let the two react for a minute or two; as it begins to foam, it is ready to use.) Gently fold mixture into the cake batter. (Again, be careful here as well. The baking soda mixture is only a small amount, so be sure to incorporate it throughout the entire bowl.)


5.) Spoon batter into prepared cupcake pans. (For this, I use an ice cream scooper; it makes this step very easy, and I get an even amount every time.)  


6.) Bake in the preheated oven for 12-15 minutes, or until a toothpick inserted into the center of the cake comes out clean. (If using two pans in the oven at once, place pans on separate oven racks, and switch racks half way through baking. Also, place them so that neither tray is above or below the other. If one pan is placed directly beneath the other, the cupcakes will bake unevenly and may not rise.)


7.) Remove from tins. Allow to cool completely before frosting. 


8.) To Make Icing: In a medium bowl, cream together the cream cheese and butter until creamy, about 5 minutes. Mix in the vanilla, then gradually stir in the confectioners' sugar, 1 cup at a time. 
  Frost cupcakes with desired amount of frosting. These usually taste better after they've mellowed in the fridge overnight. Before serving, bring them to room temperature, and enjoy! ♥
  

[Hopefully, yours will turn out a lot prettier than mine.]