Showing posts with label ♥ Home ♥. Show all posts

Saturday, July 23, 2011

♥ Two-Layer Triple-Chocolate Cake ♥


     Smitten Kitchen is honestly my new hero.

    Seriously. When you're a girl, you're PMSing, and you want chocolate, there's probably nothing better than having a chocolate cake sitting in your fridge, where you can simply walk up and grab a slice at your whim.

    For the longest time, I've been on the hunt for a chocolate cake recipe. But not any recipe: one that actually works. I've tried hundreds, and...Okay, maybe not hundreds, but I've tried enough to become extremely frustrated when I try yet another "Award Winning" recipe, and it just falls flat: either because it's not chocolatey enough, it's too dry, it's too plain, bla bla bla.

    So, when I stumbled upon Smitten Kitchen, a wonderful woman who's a part time foodie/food blogger, I was a little unsure as to whether or not I should trust her recipes: after all, a baker can only have so much trust in recipes when they fall flat each time.

     But Lord, am I glad I trusted her. Honestly, I have never ever been so proud of myself before: this was the first cake I've ever made, and I'll give myself props for once: It came out perfect.

    Really, it did. I barely give myself any credit on that though, being that the wonderful recipe was adapted by her from a Gourmet magazine recipe. The cake was so beyond moist (but still had a perfect crumb), and it was very chocolatey: not bland with a barely-there chocolate taste like the typical Hershey recipe cake. The frosting was well, kind of like Chocolate Heaven smeared all over the cake, and probably could have been eaten from the bowl, if not for the tiniest bit of self control I had left by the time I finished frosting the cake. After letting it sit in the fridge overnight (and thinking about it the entire night), I couldn't wait any longer: by 1 p.m. the next day, I cut my siblings, cousins (who were over for a sleepover during my 7 Hour Baking Marathon that night), and I each a slice, and boy were there some happy campers in my kitchen, me being the happiest one. Aside from the fact that my taste buds were swimming in chocolate bliss, I couldn't have been anymore proud of myself: I made an entire cake, it didn't fall apart, it was actually edible, and my entire family couldn't get enough of it. My smile was stretching from ear to ear all day long.

    I'm not going to lie though: it wasn't easy to do. I mean, the actual process of baking the cakes itself was pretty simple, as was making the frosting. The actual putting together of the cake is where I became stumped: first, my frosting wouldn't really thicken (which I later learned that it needed to sit for at least 2 hours before spreading..I know, I'm a genius.), and second, I had no idea how to frost a cake. It always looked so easy when my mom did it, and trust me: she did it a lot. She's always making cakes, and I sometimes go into a trance watching her frost: I'm not sure how she does it, but she always seems to somehow get it to look messy and smeared on, yet perfect and neat at the same time. Sigh.

    As you can see above, my frosting skills are far from the greatest, but I found a simple way to hide that: a handful of chocolate curls, scattered all over the top of the cake. They're elegant, easy to make, and they actually taste good, as opposed to chocolate sprinkles, which really have no chocolate taste whatsoever (next pet peeve: unedible/tasteless food decorations.) Anyway, I tried my best on the frosting, but as you can see, I probably could have done a lot better. If you ask my family though, I don't think they particularly cared all that much.

    Anyway, aside from the extreme joy and pride I gained (along with the extra 10 pounds I'll have to work off now) from the cake after it was baked, frosted, and eaten , the actual process was quite the adventure. While making the cake, I had been making the frosting for my Lemon Blueberry Cupcakes, slicing up loaves of Banana Bread, taking care of five loud, hyperactive children, and trying to clean up after myself so I wouldn't be left with a huge mess at the end of the night, all at the same time. [I know, I'm quite the multi-tasker..] Needless to say, it wasn't the easiest night I've had in a while, but I didn't say I didn't enjoy every second of it.

  Regardless of how smooth I'm making everything sound (if even), there were quite a few moments I'll probably never forget from that night. Like the moment I flipped my first ever cake: I don't think I could have ever been more terrified. Would it come out clean, or would it break and chunks of cake would be stuck all over the pan? To my luck, the cakes flipped out perfectly onto plates. Yay for problem #1 avoided!

    A few minutes later though, just when I thought everything was going well, as I was standing above my stove, making sure the cream and sugar boiling on the stove wouldn't burn, a giant (when I say giant, I mean about 1 to 2 inches long) thing crawled out from under my fridge and just about gave me a heart attack. (You know how I said I didn't think I couldn't have been more terrified than when I was flipping my cakes? Yeah, I lied.) This mutant insect, which looked like some horrifying mixture of a spider, an earwig, and a centipede, started crawling toward me, flipping its little antennas toward me, and I pretty much died. I screamed (thankfully not loud enough to wake anyone, being that it was 3 in the morning.), dropped the whisk in my hand, bolted from the stove (away from my very delicate frosting mixture) and I jumped on a chair, not knowing what else to do.  Then I was stuck: do I let my cream burn, leaving me frosting-less? Or do I get over my phobia of terrifying, disgusting insects and just kill it? Well, as my cream started boiling, I had no choice: as I watched it come back out from under the fridge,I took my foot, and, while wearing my dad's over sized shoe, squished that little sucker until it was mush. I felt kind of bad for it as I vacuumed up it's remains, but as I imagined it crawling towards me again, all guilt was gone. In fact, I was slightly tempted to take it's little body, hang it on my door, and put a sign up telling it's little friends to beware, for this could be their fate. (Idea courtesy to my crazy, sadistic boyfriend. You know who you are. ) Lesson to all my insect "friends" out there? Don't get between me and my pastries.

    Anyway, after my insect-from-hell incident, it was time to frost. This seemed fairly simple at first, but as I began, the task became more daunting than I thought. I did my best though, but well, for anyone else, well: you may want to take a look at a few lessons before you begin. And, maybe a few more... (I can guarantee you'll do a heck of a lot better than I did.)

    Now, before I continue rambling on, lets get to the actual recipe part.

    The cake was simple to make; you don't even need a mixer (even though it makes things a lot easier.) No butters and sugars need to be creamed, no egg whites to be whisked; just two bowls and a mixing spoon to whisk this magic cake to perfection.

     What makes this cake even more perfect? The fact that the frosting doesn't require a mixer either! I wish I had known from the start though: in order for the frosting to thicken to a spreadable texture, it needs about 2 hours to sit and set up. It's a ganache frosting, meaning it's made from chocolate and cream; it's a heavenly combination, but unfortunately, it does take time to make.

    So, after about two essays worth of rambling, I hope I've convinced you to make this cake.

    I haven't?

    Well, let's give you more reasons then!

♥ It's amazing.

♥ It's chocolatey.
   No. It's beyond chocolatey. Like chocolate heaven, piled high on your spoon (or fork; your preference.)

♥ It's fudgy; like my Dark Chocolate Espresso Brownies, only in cake form (but not at all like a cake brownie. No, no, no.)

♥ It's magical. It will make you smile. It will make your taste buds sing to the Chocolate Gods above. It will make your children happy. It will probably pack on a few pounds to your tummy; but, it's worth it.

    Have I convinced you yet?

    Good.

    Happy baking! ♥

Two-Layer Triple-Chocolate Cake
Ingredients:
(for two 10- by 2-inch round cakes)
♥ 3 ounces fine-quality semisweet chocolate such as Callebaut (I used Hershey's, and it came out perfect)
♥ 1 1/2 cups hot brewed coffee
♥ 3 cups sugar (I didn't have enough white sugar on hand, so I did half granulated/half dark brown. Again, it worked out perfectly!)
♥ 2 1/2 cups all-purpose flour
♥ 1 1/2 cups unsweetened cocoa powder (not Dutch process)
♥ 2 teaspoons baking soda
♥ 3/4 teaspoon baking powder
♥ 1 1/4 teaspoons salt
♥ 3 large eggs, room temperature
♥ 3/4 cup vegetable oil
♥ 1 1/2 cups well-shaken buttermilk, room temperature
♥3/4 teaspoon vanilla

1.) Preheat oven to 300°F. and grease pans. Line bottoms with rounds of wax paper and grease paper. (I just sprayed each pan with non-stick spray, and they came out fine.) 


2.) Finely chop chocolate and in a bowl combine with hot coffee. Let mixture stand, stirring occasionally, until chocolate is melted and mixture is smooth.
3.) Into a large bowl, using a whisk, sift together sugar, flour, cocoa powder, baking soda, baking powder, and salt.


 4.) In another large bowl, beat eggs until thickened slightly and lemon colored (about 3 minutes with a standing mixer or 5 minutes with a hand-held mixer). Slowly add oil, buttermilk, vanilla, and melted chocolate mixture to eggs, beating until combined well.
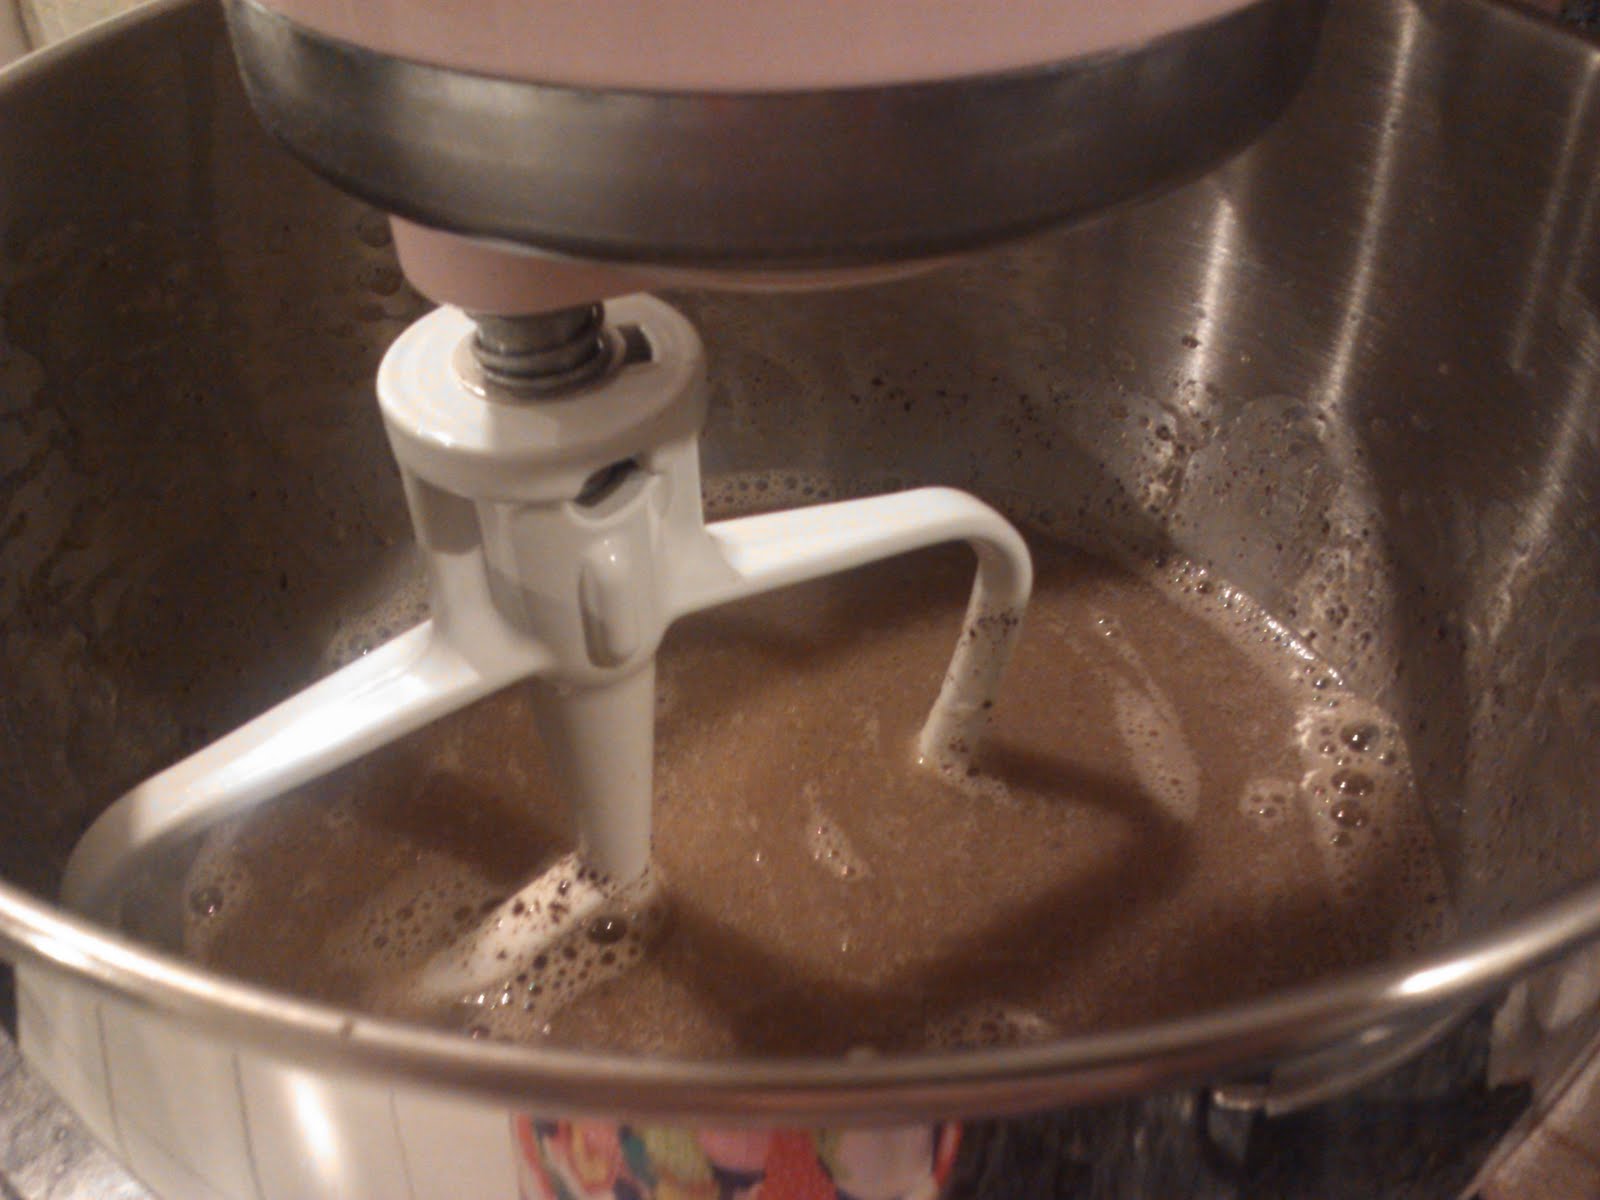

5.) Add sugar mixture and beat on medium speed until just combined well.
6.) Divide batter between pans and bake in middle of oven until a tester inserted in center comes out clean, 1 hour to 1 hour and 10 minutes.


7.) Cool layers completely in pans on racks. Run a thin knife around edges of pans and invert layers onto racks. Carefully remove wax paper and cool layers completely. Cake layers may be made 1 day ahead and kept, wrapped well in plastic wrap, at room temperature.

For Filling and Frosting:
♥ 1 pound fine-quality semisweet chocolate such as Callebaut (I used Hershey's)
♥ 1 cup heavy cream
♥ 2 tablespoons white sugar
♥ 2 tablespoons light corn syrup
♥ 1/2 stick (1/4 cup) unsalted butter, room temperature
 
1.) Finely chop chocolate. In a 1 1/2- to 2-quart saucepan bring cream, sugar, and corn syrup to a boil over moderately low heat, whisking until sugar is dissolved.
2.) Remove pan from heat and add chocolate, whisking until chocolate is melted. Cut butter into pieces and add to frosting, whisking until smooth.
3.) Transfer frosting to a bowl and cool, stirring occasionally, until spreadable (depending on chocolate used, it may be necessary to chill frosting to spreadable consistency) (It takes two hours for frosting to come to a spreadable consistency.) Or, I found that stirring this over a bowl of ice water did a great job of cooling it off quickly and evenly.
4.) Spread frosting between cake layers and over top and sides. Cake keeps, covered and chilled, 3 days. Bring cake to room temperature before serving.

 Enjoy! 
[I know I did.]

Monday, July 18, 2011

♥ Lemon Cupcakes with Blueberry Buttercream ♥


    Every time I've ever baked in my kitchen (or any kitchen, for that matter), I've always learned something, each and every time. During this bright, summery-themed adventure (part of my 7 Hour Baking Marathon a couple nights ago), I learned something new about myself:

    I don't like the combination of lemons and blueberries. At all.

    I was always entranced by the two together: the colors complimented each other so perfectly, so shouldn't the tastes have too? I always assumed so, but when I tasted the buttercream from this recipe, my taste buds gave their answer: a big, fat, slightly-repulsed no.

    That's just my opinion, of course. People can't seem to get enough of this combo, especially during summer when both fruits are at their best. Maybe it's just because I've never really liked blueberries (I think. I don't care for them on their own, but when they're baked into a pastry, I can't get enough of them. Plus their color is to die for.. Love-Hate Relationship much?), or maybe it's just because that night, after spending about an hour of working with lemons, lemons, and oh, more lemons, the taste started nauseating me, and then with the addition of lemon zest into the frosting...my taste buds were just not happy campers.

   After I forgot about the cupcakes for a few days in my fridge though, the frosting wasn't all that bad. Regardless though, my family went bonkers for it, so I guess it's all good.

    The cupcakes we're really amazing though. The recipe came from a blogger named My Baking Addiction, and it was absolutely wonderful: the cupcakes were perfectly soft, fluffy, sweet, and lemony. I didn't get a chance to try out the lemon curd recipe that went with it though, but if anyone wants to try it, the recipe can be found here.

    Now, after spending 2 hours baking these little gems and making the frosting to go with them, but then being disappointed with the frosting, there was no way I'd let my hard work go to waste and leave these cupcakes plain, so I made a quick icing to go on them: by whisking about 2 tablespoons of milk, a drop of lemon extract, and enough powdered sugar to thicken it, I had a simple but perfect topping for my little cakes.

    The original recipe for these cupcakes can be found here, or, you can just follow it down below for a few tips and pointers. Happy baking! :]

Lemon Cupcakes

Ingredients: 
♥ 2 1/4 cups cake flour
♥ 1 tablespoon baking powder
♥ 1/2 teaspoon kosher salt
♥ 1 1/4 cups buttermilk, well shaken, room temperature
♥ 4 large egg whites, room temperature (crack egg whites into a bowl, and let come to room temperature)
♥ 1 1/2 cups granulated sugar
♥ 2 lemons
♥ 1 stick (8 tablespoons) unsalted butter, at room temperature
♥1 teaspoon pure vanilla extract
♥ 1/2 teaspoon pure lemon extract

1. Preheat oven to 350°. Line cupcake tins with paper liners. In a large bowl, sift together the flour, baking powder and salt. (this can just be done by simply whisking everything together.)


2. In a medium bowl, whisk together the milk and egg whites.
3. Place lemons on a plate. Zest each lemon completely with a zester. If you don't own a zester (or can't find yours like me), you can simply use a grater.


4. Place the sugar and lemon zest in the bowl of your mixer or another large bowl and rub them together with your fingers until the sugar is moist and fragrant.


5. Add the butter and, working with the paddle or whisk attachment, or with a hand mixer, beat at medium speed for a full 3 minutes, until the butter and sugar are very light. Beat in extracts.


6. Add one third of the flour mixture, still beating on medium speed. Beat in half of the milk-egg mixture, then beat in half of the remaining dry ingredients until incorporated. Add the rest of the milk and eggs, beating until the batter is homogeneous, then add the last of the dry ingredients. Finally, give the batter a good 2-minute beating to ensure that it is thoroughly mixed and well aerated.


7. Using a large ice cream scoop (about 3 tablespoons), distribute the batter between 24 muffin wells, filling each well 2/3 full.


8. Bake for 18-22 minutes, or until the cupcakes are springy to the touch and a toothpick inserted into the centers come out clean. Cool on wire rack.


Ahhh! I still cannot get over how perfect they came out.

The link for the buttercream and curd recipes are listed in the link above. Sadly, as I made the frosting, my camera battery decided it was going to die and leave me camera-less, so I have no pictures for that. I do have pictures of the finished product though...


Enjoy!

Sunday, July 17, 2011

♥ Dark Chocolate Espresso Brownies: Yes, just another Brownie Recipe to add to the Internet. ♥


    If there's one dessert I'm more picky about than cake, it'd probably have to be brownies. Everyone has pet peeves, right? Well, being that I can be a bit of a baking snob, I have tons of baked good pet peeves.

    The main offender?

    Cake-like Brownies.

    I honestly try to respect everyone and their opinions, I do. But for crying out loud: if you're going to eat a brownie, then people, please, for the love of God, just let it be the brownie it's supposed to be and make it fudgy. If you want a dry, non-fudgy "cake" brownie, then just eat a piece of chocolate cake. Problem solved.

    Clearly, I'm all for fudgy brownies: the richer, the better. So, obviously I'd post a recipe for an extremely fudgy brownie: never anything less, but you know..again, the more (fudgy), the merrier. :)

    Now, before I ramble on about how this recipe is probably the best brownie recipe out there, or how these brownies will just completely blow any other recipe you have out of the water...I'm just going to point out now that no, these probably aren't the most amazing brownies you've ever had, but to me, they come about as close as I've had.

    From blog to blog, bakers have adjusted and tweaked their brownie recipes to their likings, many using the oh-so famous brownie recipe from Ina Garten, my mother and I's cooking/baking hero. We've never tried her recipe for her outstanding brownies, but at this point, I think I'm perfectly okay with mine.

    These brownies are pretty much my go-to brownie recipe when I'm being my typical baking-snob-self and refuse to make them from the box (even though box brownies were one of my favorite things as a kid, and nothing can replace their nostalgic taste). This recipe can pretty much be tweaked to your liking: the chocolates can be varied from dark, to semi-sweet, or even to milk if you'd like. And, the espresso is optional: I personally love the combination of dark chocolate and coffee, especially since the coffee really brings out the chocolate flavor. My combination of choice is dark chocolate, espresso, and a few chocolate chunks thrown in here and there, so I suggest that. But, if you like nuts, marshmallows, or anything else not mentioned here, feel free to throw 'em in during the last step. They are your brownies after all: it's all up to you!

   This recipe is extremely simple to make. In fact, it doesn't even require any bowls! All you need is a large sauce pan, and you're good to go. I've made this recipe over 10 times (I used it for my final project in Cooking Class this year, which was a Cooking Demonstration. After making it once and messing it up due to my mis-reading of the ingredients, then once more when trying it again, then another 4 times before and during the demo, plus all the other times I've made it just for my friends and family...I can now truthfully say this a 1OO% CupcakeGirl approved recipe!) Even the most unskillful pre-chefs can make it, and I'm 1OO% sure they'll come out perfect.

    So brownie-lovers...Are you ready for some intense-chocolate-mouth-explosions? Yes? Yippee!

Dark Chocolate Espresso Brownies

Ingredients:
♥ 1 stick unsalted butter, cut into pieces
1 1/2 cups (12 ounces) dark chocolate (or, semi-sweet, milk, or bittersweet: it's your preference!)
♥ 1 cup white sugar (I realized I only had brown sugar on hand when I made them last, but they still worked fine.)
3 eggs
1 teaspoon vanilla extract
♥ 1/2 teaspoon salt
♥ 3/4 cup flour (I usually use all-purpose [I always prefer unbleached], but wheat works,too)
♥ Walnuts, chocolate chunks, marshmallows, or any other preferred additions (for espresso flavor, I added 1/3 cup hot espresso made with instant espresso powder; regular hot coffee works just as well, too.)

1.) Preheat oven to 350°. Spray a baking pan with non-stick spray. (I prefer my brownies moderately thick, so I used a 9 by 9 pan.)
2.) In a large sauce pan, melt butter over medium heat on stove. Add chocolate, and stir until melted together.


3.) Whisk in sugar directly into chocolate-butter mixture until completely combined. Remove from heat.

4.) Whisk in eggs, vanilla, and salt. Add flour and mix until completely combined and smooth. (To ensure my salt didn't get clumped into one spot, I just sifted it quickly into the flour before adding it.)

5.) Mix in any extra additions, and add batter to pan. For my 9 by 9 pan, I baked them for 25-30 minutes. For anything bigger, I'd say time it for 20 minutes and go from there. Brownies will be ready when a toothpick inserted in comes out clean (I usually like my brownies a little undercooked though, so...). Let brownies cool for at least 30 minutes before cutting to ensure a smooth, clean cut. But, if you like hot, fresh brownies...dig in right away!


   The night I baked these, my younger cousins unexpectedly (to my other sister and I, who had no idea my siblings invited them over) dropped by for a sleepover, and I felt obliged to make them some sort of treat while they were here. Brownies seemed easiest (and c'mon; who doesn't love brownies?), and well....you can guess how much they were enjoyed.


Ready to have a choco-fudge-gasm? 
If not..well, we may have a problem then.
Enjoy!

Saturday, July 16, 2011

♥ Banana Bread ♥


    Oh, banana bread.
    The way we Americans can take the healthiest foods we have and turn them into such fattening, unhealthy desserts..It's a little funny, isn't it?

    Now, keep in mind how I'm not insulting us, because like any other American, there's nothing I love more than sweet, soft, moist banana bread (okay, there's a lot of things I love more, but still.) As a kid, I always remember sitting in the kitchen, watching my mom bake up all sorts of pastries: cookies, cakes, cream puffs, muffins, breads, and so much more. One of my favorites was always her banana bread, which sometimes she'd bake into muffins for me and my siblings. I never really counted it as dessert, but more as a snack. It's not hard to understand why I thought that way: after all, it's made with fruit and there's no chocolate in it, so to a small child, how could it possibly be a dessert?

    Well...maybe mine now would seem like dessert, being that if I have some on hand, I'll throw a handful of chocolate chips into the batter (to the dismay of my mother, who can't get enough of the chocolate-banana combination, even as she angrily rants that her hips can get well enough every time she eats it). This recipe originally came as a banana-nut muffin recipe from Allrecipes, and it worked great the first time I made it; my best friend, of whom apparently "loves everything I make", had 3 the day I brought them to school. Out of all the compliments I got on them, that probably tops them all.

    About a month after baking them into muffins, I made the recipe at home into loaves of bread. I was bored at home on night, and while I was rummaging through the pantry for Wheat Thins, I found a few bananas, too brown to eat, laying in the back, untouched. I remembered the muffins and decided to make some, but after making the batter, I realized I had no papers for my muffin pan. Being too tired to care at that point, I found a loaf pan and baked it anyways, and I'm glad I did: ever since, the recipe has been my go to banana bread recipe.

    This recipe, which is extremely simple, comes out perfect every time. There was once a time where I thought there was no way to mess up banana bread: it's so simple, and the bananas keep it perfectly moist; how could one possibly mess it up? Well, a few months back during my cooking class at school, our final project was a cooking demonstration in front of our class. One the girls in my class, part of the group of "popular" kids, demonstrated banana bread, and after watching her demo, I felt a little better about myself. The girl was a bitch to me all throughout my childhood, teasing me and making me feel, well, not as good as a I should of about myself (damaged self-confidence to this day? Unfortunately, yes.) But as we got older, the joke was on her: While I was still a nerd (but now proud of it) and she got more popular, I actually got smarter, while somehow, I think she may have stayed at the same intelligence level she had in 5th grade, only now knowing how to dress, act, and be the "strumpet" of our grade . I was right of course, because when I bit into the samples she gave to the class, it was a bittersweet moment: the dry, tasteless chunk of "banana" bread in my mouth was a sign that even if she was more "popular" than me, it really did prove her stupidity; only an idiot can truly mess up banana bread.
[Don't mind my immature ranting. I am, after all, a 16 year old girl. We're petty that way.]

    Anyway, back to the bread...
The recipe can make about 18 muffins, or about 2 small (2 by 5 loaf pan) loaves of "bread". It also doesn't call for chocolate chips, but like I said, my family prefers it that way, so I'll usually make two different loaves and only add some to one.
Also: the recipe calls for bananas, but what I've realized lately is that the more ripened the banana, the better the product. For those who don't know, the more ripened the banana (i.e. the browner, more "spoiled" it is), the sweeter the banana. I usually like to wait for bananas to get extremely ripe, but usually ahead of time, I'll place a few in a brown paper bag and store it in the pantry to speed up the process. If you're in a crunch for time, there's an even faster method for browning them:
    Preheat your oven to 400°. Place the bananas on a baking sheet (peel on) and bake them for 10-15 minutes, until they're mushy and soft, and the peel is completely dark brown, almost black. To "peel" the bananas, simply take a sharp knife and make a slit through the banana; it should cut easily, and by then, you can just squeeze the banana "mush" right through.


Oh, yum...Don't those 'naners just look so scrumptious? (Warning: once the bananas bake in the oven, they produce a very strong banana..."odor". I found it a little nauseating, and was unsure if I should use them at that point, but they worked perfectly. Also, when the bananas bake, they'll start to (...leak?). That's completely normal as well.)

Happy Baking! ♥

Banana Bread  

Ingredients:

♥ 1 1/2 cups all-purpose flour
♥1 teaspoon baking soda
♥ 1 teaspoon baking powder
♥ 1/2 teaspoon salt
♥ 3 bananas, mashed
♥ 3/4 cup white sugar
♥ 1 egg, lightly beaten
♥ 1/3 cup vegetable oil
♥ Chocolate chips (optional)


1.) Preheat oven to 375°. Spray pans with non-stick spray, or line muffin tin with papers.
2.) In a large bowl, sift together flour, baking soda, baking powder and salt. (this can just be done by simply whisking all the ingredients together.)


 3.) In another bowl, beat together bananas, sugar, egg and oil. Stir the banana mixture into the flour mixture just until moistened. (If you are adding chocolate chips to the batter, stir them in at the last step. I only added them to half the batter, and I used around 1/3 to 1/2 cup. For the whole batter, I'd say add an entire cup.) Spoon batter into pans.


4.) Bake in preheated oven. For the loaf pans I used above, it took about 30-40 minutes for each to bake together in the oven; for the muffins, it only takes about 15-20 minutes. 


5.) If using cupcake pans, remove muffins immediately and let cool on cooling rack. If using loaf pans, let pans sit until warm/almost cool. Flip loaves onto a flat plate, and slice each piece to your desired thickness. (I cut each slice to about an inch thick.)
Then...enjoy! 
As you can see..I'm pretty sure my family did.

Sunday, July 10, 2011

♥ Buttermilk Pancakes ♥


    During the school year, there's pretty much nothing I dread more than mornings during the week. Honestly, there never seems to be one bright thing about them (literally; during winter, the sun isn't even out by the time I'm on the bus). Recently though, I discovered that even the slightest treat for breakfast can fix up an entire morning.

    Pancakes have always been one of my favorite things for breakfast, even though they really have no nutritional benefits to them; what's healthy about flour, sugar, and butter? That never really phased me as a child, so to this day, if I'm sitting in front of a big, hot stack of pancakes, I'm most likely not going to care about the horrible affects they'll have on my hips and tummy.

    ..That is, if they're from scratch. Since my health kick in 8th grade, I swore of anything Betty Crocker related; and, sadly enough, my childhood mornings always seemed to be filled with Bisquick, my mom's favorite mix for pancakes. Once I started becoming health-conscience and I actually read what was in Bisquick, I was horrified. Since then, I won't even touch that stuff: besides knowing what horrors are in there, they just don't taste all that good anymore.

    Oh, but the irony. This recipe was given to me by my darling Cooking Teacher, an older, darling Italian woman with a passion for cooking that's just absolutely inspiring. The ironic part?
    She got the recipe from a Betty Crocker cook book.
....Sigh.

    Regardless of it's origin, these pancakes always come out amazing. I'm always telling my mom how I've decided that Buttermilk is "Magic Milk"; replace it with regular milk in a baked good and it comes out 1O times better. The same goes for these pancakes. This recipe is simple, and the pancakes come out fluffy and perfectly sweet!

Buttermilk Pancakes

Ingredients:
1¾ cups all-purpose flour
3 tablespoons granulated sugar
2 teaspoons baking powder
½ teaspoon baking soda
¼ teaspoon salt
1 egg, lightly beaten
♥  ½ teaspoon vanilla
3 tablespoons vegetable oil
1½ cups buttermilk, well shaken
  1. Sift together dry ingredients in a large bowl.
  2. In a medium sized bowl, add egg, oil, vanilla, and buttermilk; stir together.
  3. Add the wet ingredients to the dry ingredients; stir until just combined. (Lumps in the batter are fine!)
  4. Place batter on a skillet or pan, heated to medium heat. Flip pancakes as bubbles start to form on top.
  5. Serve pancakes with your favorite syrup and fresh fruit. This recipe makes about 12 medium size pancakes. Enjoy! ♥

♥ Not-So-Red Velvet Cupcakes ♥

  
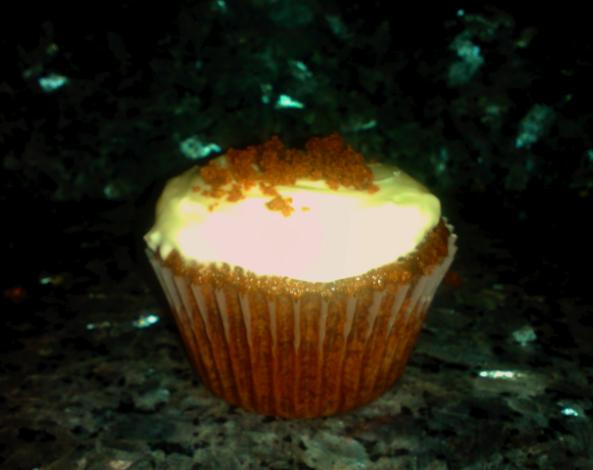
    So...Like I said before, I'm not exactly the best 16 year old photographer on the block.

    In fact...Far from it.

    In addition to my horrible photography skills comes the unfortunate fact that I have only two cameras: my Kodak digital camera, and the camera on my phone, both of which have less than great quality. The camera on my phone works better than my actual camera, so until I take photography in my senior year... this is probably the kind of pictures you'll be seeing on my blog. *Sigh*.

    Anyway, now to the cupcakes...
I never really understood red-velvet cupcakes. Or, red-velvet cake in general for that matter. It lacked any sort of actual flavor, besides that slight hint of vinegar you have to fight to taste. In that case, who really likes the taste of vinegar anyway? (Well...probably a lot of people, especially in the South.) I can truthfully say I'm not a fan of vinegar at all, but hey, that doesn't mean everyone's the same way.

    Now, I'm sure some are wondering: If you don't like red-velvet, why on Earth would you make it?

    Well, the only thing I don't have against red-velvet is, well, the color. When I see little red-velvet cupcakes, topped with rich, white cream cheese frosting that off-sets the bright, vibrant red of the cake, I'll pathetically admit: I become slightly entranced by it.

    That isn't the only reason I made it though. This summer, I'm on a Cupcake Quest, trying to find and perfect recipes for all the basic cake flavors: chocolate, vanilla, lemon, strawberry, spice, white, and well, red-velvet. I figure if I'm CupcakeGirl, I can't discriminate on flavors. Why not give each it's chance to shine?
    Even though at first I didn't really have a preference for them, as soon as I frosted my little red gems with that addictive, sweet icing, they started growing on me. So, I'll admit: I guess red-velvet is okay...but I still prefer my classic real chocolate cake.

    As for my Red-Velvet adventure, not to my surprise one bit, there were quite a few problems along the way, and even in the end. You can only imagine the sadness in my perfectionist-heart when my little red gems came out of the oven...well, not very red. They were more of a reddish-brown; not at all the bright vibrant red I wanted. In addition to that heartbreaking bit, they also didn't rise as well as I wanted them to. As I thought about it though, I managed to pin-point where I went wrong as I went over each step in my head afterward. So, if you haven't already attempted your own red-velvet adventure, here's some tips to help get you started:

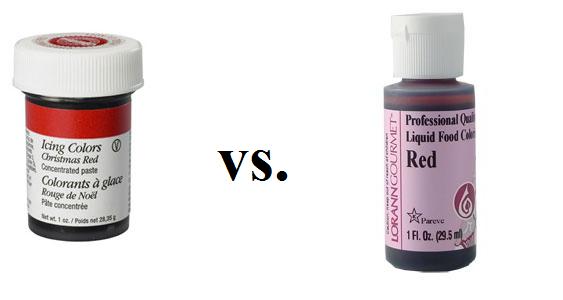
♥ This recipe called for liquid red food coloring, but I only had a gel on hand. Thinking if I just mixed it with water, I'd probably get the same results. I was right...partially. In using the gel, I didn't use the right amount of coloring whatsoever, so in making a paste with the color and the cocoa powder (the typical way of incorporating both ingredients in red velvet), the brown to red ratio was completely off, and I ended up with a brownish-red glob...yeah, not so much the dark vibrant red I needed. If you know how to make an exact substitute for liquid food color with the gel and water, go right ahead. But, if you're still a little inexperienced like me...just stick with the liquid, please.
 ♥ Next, one thing I really didn't do right was the last step: incorporating the baking soda/vinegar mixture completely into the batter. This mixture goes in last, and since it's the only leavening agent in the entire batter, it needs to be thoroughly mixed through the whole bowl. I stirred it in quickly, not paying enough attention to this step, which is probably why these cupcakes didn't rise as much as they should have. The recipe came from Allrecipes, in which I took the tips from users who'd made the recipe dozens of times. Comparing their pictures to mine...I can guess I did something wrong, to say the least.
    Am I extremely jealous of their fluffy red cupcake and beautifully piped frosting as well? ...Yes, yes I am.

♥ Finally, for the frosting, I used a cream cheese frosting, also from Allrecipes. The recipe claimed it could be piped, but even as I left it to chill in the fridge for a while, I could not get it to pipe whatsoever: it wasn't runny, just too thin to pipe. That had nothing to do with the taste though; my family raved it was one of the best frostings I'd ever made. It wasn't too sweet, but not too tangy either. If you're not a frosting snob like I, go ahead and use my recipe; if you want to pipe it though, you may want to use your own.

    Besides all my self-caused problems, this recipe actually came out pretty well. My boyfriend, a "Southerner At Heart" (He's a horror-movie fanatic, but was converted to "Cowboy" status by the movie Country Strong; go figure), as well as a red-velvet fanatic, claimed they were really good. The boy is picky about his cake, so I'll take that as a perfect sign to say this recipe is a keeper...for now.
    Like I said before, when I bake cupcakes, they have to be perfect, but this recipe came out only pretty good (to my standards: remember, I'm a perfectionist!). I'll be trying out another red-velvet recipe soon enough, but for now...Happy Cupcake making! ♥

Red Velvet Cupcakes with Cream Cheese Frosting

Ingredients: 
(for cupcakes)
♥ 3 tablespoons unsweetened cocoa powder
♥ 2 ounces liquid red food coloring
♥ 1 cup buttermilk, well shaken, room temperature
♥ 1 teaspoon salt
♥ 1 teaspoon vanilla extract
♥ 1 cup vegetable oil
♥ 2 cups granulated sugar
♥ 2 eggs, room temperature
♥ 2½ cups all-purpose flour, sifted
♥ 1½ teaspoons baking soda
♥ 1 teaspoon white vinegar

(for frosting)
2-8 ounce packages cream cheese, softened
½ cup (1 stick) butter, softened
4 cups powdered sugar, sifted
2-3 teaspoons vanilla

1.) Preheat oven to 350° F. Place cupcake papers in 2-12 count cupcake pans. (I got around 24 cupcakes from this recipe.)


2.) Make a paste of cocoa and food coloring. Set aside.(This is where I messed up, so be careful. The paste should be a dark, vibrant red, not a brown-red color.)


3.) Combine the buttermilk and vanilla and set aside. In a separate bowl, sift together the salt and flour. (To sift together dry ingredients, you can always just whisk them together until they are combined.)

 4.) In a large bowl, beat together the oil and sugar. Beat in the eggs one at a time, then stir in the cocoa mixture. Beat in the buttermilk mixture alternately with the flour, mixing just until incorporated. 


5.) Stir together baking soda and vinegar. (Let the two react for a minute or two; as it begins to foam, it is ready to use.) Gently fold mixture into the cake batter. (Again, be careful here as well. The baking soda mixture is only a small amount, so be sure to incorporate it throughout the entire bowl.)


5.) Spoon batter into prepared cupcake pans. (For this, I use an ice cream scooper; it makes this step very easy, and I get an even amount every time.)  


6.) Bake in the preheated oven for 12-15 minutes, or until a toothpick inserted into the center of the cake comes out clean. (If using two pans in the oven at once, place pans on separate oven racks, and switch racks half way through baking. Also, place them so that neither tray is above or below the other. If one pan is placed directly beneath the other, the cupcakes will bake unevenly and may not rise.)


7.) Remove from tins. Allow to cool completely before frosting. 


8.) To Make Icing: In a medium bowl, cream together the cream cheese and butter until creamy, about 5 minutes. Mix in the vanilla, then gradually stir in the confectioners' sugar, 1 cup at a time. 
  Frost cupcakes with desired amount of frosting. These usually taste better after they've mellowed in the fridge overnight. Before serving, bring them to room temperature, and enjoy! ♥
  

[Hopefully, yours will turn out a lot prettier than mine.]